So I am busy gearing up for my annual hosting of bookclub next week. We are discussing
The Night Circus by Erin Morgenstern. It is a fabulous read - I highly recommend it. If you've read it you know the circus is all black and white, down to the very hair of the performers. So naturally in keeping with the theme of the book, I've been going crazy with black and white ideas for lunch. I don't want to give too much away before the event, but I did want to post this tutorial for making some really fun name tags for the table.
I got a
Silhouette machine several months ago and (I'm ashamed to admit) have been too intimidated to try it out. I was very comfortable with my Cricut and imagined having to learn all this complicated software and convinced myself I didn't have the time. I wish I had tried it sooner. It is SO EASY to use, and the possibilities are endless. Since you don't need cartridges, you can essentially cut out any digital image. Silhouette was nice enough to send me a roll of their Chalkboard Vinyl and this brain child was born.
1. Choose any image in the whole wide world. I used this image and altered it so the top of the tent would be solid, leaving a place to write the names.
2. Send the image to the machine to cut out the chalkboard vinyl. For info on this step, go
here.
3. Cut a sheet of transfer paper the same size as your image(s), peel off the protective backing and place the sticky down against your vinyl.
4. Roughly cut around each image so they are easier to work with.
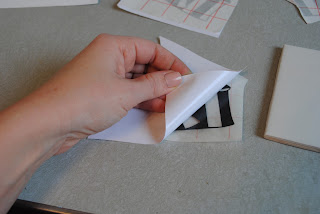
5. Peel backing away from vinyl, leaving the adhesive side of the vinyl and transfer paper exposed.
6. Position image on your tile and rub firmly to smooth out any bubbles. (I bought basic white bathroom tiles from Home Depot - I think they ran about $.15/each.)
7. Carefully peel off transfer paper.
8. Hot-glue a clothespin to the back so it will stand up. If you bend it far enough, it will lock into an A-shape.
And voila! Fabulous place cards for my black and white themed bookclub.
You could easily use this same method with any shape. Great for birthdays, dinner parties, church function, you name it!


